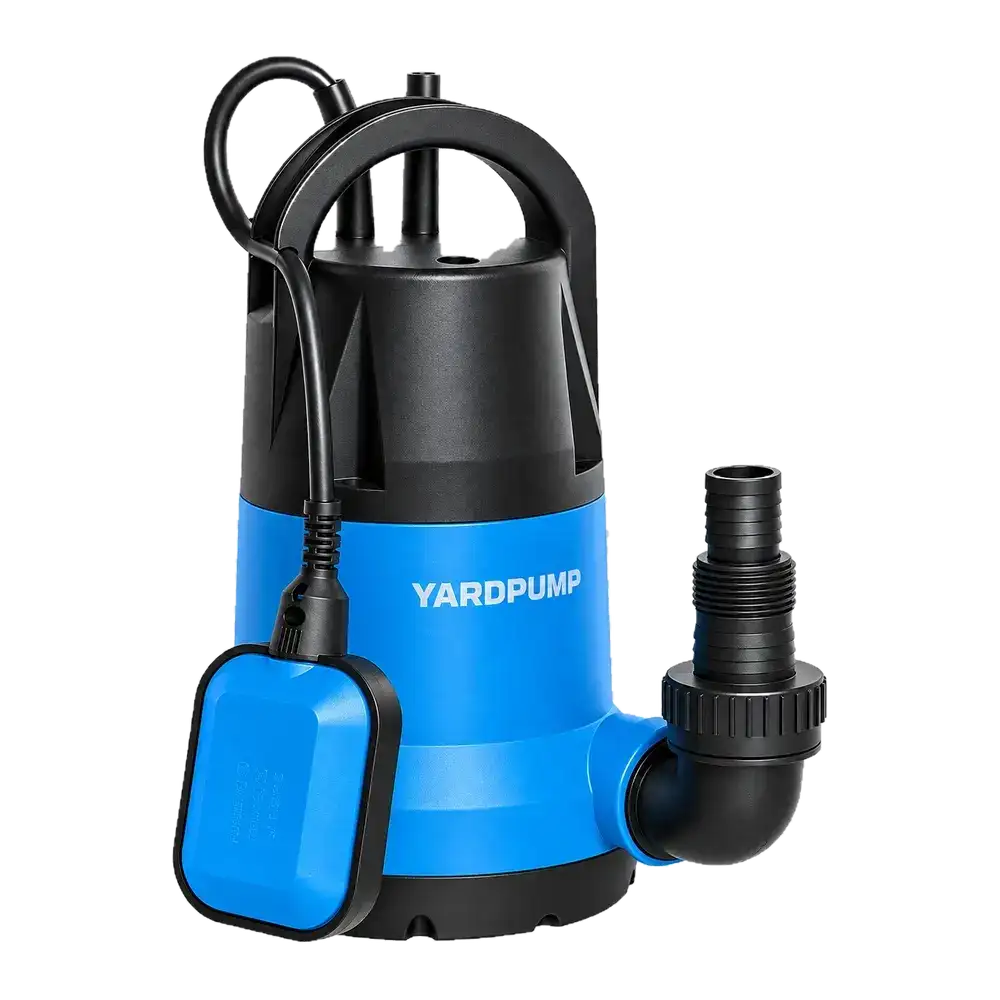
Suppose a retrofit basin is 450 millimetres wide inside and the pump body measures 230 millimetres at its widest point. The pump appears to fit. The hatch, however, has a rim, a ladder bracket or a crossing pipe. The installed pump now has a discharge elbow and the rigid line cannot simply move out of the way. Choose the pump and its connections so that the service assembly can be disconnected and removed from outside the basin. Being able to lower a bare pump on installation day does not establish service clearance.
Measure the opening the pump actually sees
From a safe position outside, record the smallest clear width and length beneath the open cover. Check the short vertical section below it for a narrowing frame, brackets or obstructions. Sketch the outlet pipe, valve, cable fixing point and lifting direction. Add elbows, unions, flanges or guide hardware to the drawing wherever they come out with the pump. An assembly that can turn down in the pit may not be able to straighten again below the open lid.
A ground-level trial is cheap. Make a cardboard opening at the measured size and use a de-energized sample or a lightweight model of the same dimensions. If the pump must be tilted, test the entire move: lift from its support, clear the connection, turn, pass through the hatch and reach the landing area. Allow room for the cable to bend naturally and the float to move after the pump goes back. A flexible hose is not meant to be pinched to make the drawing fit. Never reach into a powered or unexpectedly filling basin to measure it.
An illustrative 15 millimetre interference
Suppose the cover is listed as 320 millimetres wide but its frame takes up 25 millimetres on each side. The opening is 270 millimetres. The pump body takes up 230 millimetres, but with its side elbow it needs 285 millimetres. It is at least 15 millimetres too wide for a straight lift even before clearance for tilt, handle position or safe manipulation. If an accessible, designed connection lets the fixed part stay behind, check the remaining removable assembly again. A shorter elbow that still projects to the same side might not change the result.
Give the supplier a maximum envelope with all fittings that travel with the pump. Show the opening orientation and any keep-out zone. For a guide-mounted pump, check actual disengagement and reseating against the stationary coupling. A pump that stands neatly on the workshop floor has not passed that test. Tie the approved drawing to the same elbow and connection revision that will be shipped.
Keep the service steps above the opening
Place the service connection so it can be released from outside after power is isolated and verified off and retained pressure or water has been made safe. Lift only from the approved lifting point with suitable equipment. Neither the power cable nor the float cable is a sling. Check overhead room for the lifting gear and how the opening will be guarded after removal. If a layout requires someone to enter the basin just to exchange the pump, have qualified personnel review the hazards and service procedure. Entry is not a normal assumption for a small retrofit.
Have a person who did not install the pump follow the drawing and run an unpowered removal and replacement trial. Record which connection is released first, which piece stays fixed and where a second person is needed. That sequence tells the next technician more than a photograph of the unit sitting at the bottom.
Frequently asked questions
Is the clear diameter enough for a round hatch?
Check the diameter after protrusions are deducted, then verify the sweep of long fittings and offset handles. Hardware below the rim can still block the lift.
Can the elbow simply be removed first?
Confirm it was designed for field removal, is accessible from outside and can be resealed reliably. Do not improvise changes to pressure-bearing parts.
Why test putting the pump back?
A guide shoe may come free but resist alignment on return. Check that the discharge reconnects and that the cable and float cannot be trapped.